
Friends, fun and a weekend of Bonsai - I never miss one of the Lone Star Bonsai Federation state conventions. This year it was hosted by the Houston Bonsai Society, a great group with a lot of energy. As usual, the workshops and critiques were thought provoking, the vendors brought way too many goodies that shrank our wallets (oh the handmade bonsai pots and handcrafted wood stands!), the exhibit featured some of the best Bonsai in the state, raffles kept the atmosphere fun and light, and wherever you turned there was some event taking place whether it was the Emerging Talent Competition or the late-night Pub Committee.
One thing that I did not expect though was to win one of the prizes of best trees in the exhibit, judged by the visiting artists. You can imagine my surprise at the banquet ceremony as I'm sitting crossed-legged and barefoot on the floor taking photos for the club newsletters when they call my name. I was awarded Best Broadleaf Evergreen for my Boxleaf Euonymus in the Exhibit. I was touched and honored, and was given a laugh when I came down from the stage and heard someone say "congratulations hippie!" Ah, my people!
Here is my full (small) display from the show: a small Boxwood, a Wood-Violet accent and the Boxleaf Euonymus. It was chosen by the visiting artists: David DeGroot, Arthur Joura and Pedro Morales.

2005 March. The story of this tree, Euonymus japonica 'Microphylla' began in my neighborhood. A new family had moved into an older home and wanted all the older shrubs removed. The estimate is that the bushes had been there for about 30 years. It was my luck that I happened to be biking down that street that day and noticed they had dragged two shrub stumps out to the curb for trash pick up. At the time, I didn't even know what variety of plant they were, only that the bark had an interesting deep reddish color with tiny white streaks. The internet is your friend in plant ID!

2005 March. They were nothing to look at, at this point, just two big clumps of trunks that were all fused together at the base. I soaked the dry root-balls overnight to rehydrate them, and the following day began washing the old mud from the roots and trying to detangle the trunks which proved impossible.
.JPG)
2005 March. I couldn't get a tool in-between the roots to pry them apart. I tried to imagine leaving the multiple trunks together, but I couldn't see the design. There had to be another way. On the ground it went:

2005 March. And out came the electric chainsaw! I cut as carefully as I could, avoiding the important surface roots and trunks as much as possible.
+b.JPG)
2005 March. Amazingly, it wasn't only the surface roots that were fused, the roots were together much deeper as well. It was almost like a solid block of wood with random holes.
+c.JPG)
2005 March. After a short time of separating, this is what I came back with: individual trees, sometimes in multiples of 2 or 3, but all had a base and shape of their own. No longer was it just a random mass of trunks. This photo is of the clumps, newly sawn apart and separated.
.JPG)
2005 March. This brings us to one grouping with three trunks dancing around each other:
+ab.JPG)
2005 March. I hadn't worked with this type before, so I tried to be careful with the roots, leaving plenty of them and plenty of room in the pot.
+bb.JPG)
2006 January. I had let the tree grow for the year, removing nothing from the top to try to strengthen the roots. It had a little die-back, but also produced lots of buds all over the trunks, sprouting multiple buds from each location (as many as 10!).
+a.JPG)
2006 January. This is the shot after thinning the extra branches in each of the bundles, cleaning out the few dead branches and putting in a "prop" to separate the trunks in the middle. The prop was just a few pieces of chopstick lashed together with electrical tape.
+b.JPG)
2008 February. Whorl branches were continuing to be removed and over-long shoots were trimmed back to equalize the strength of the branches. It grew well and popped more buds, but showed me how slow this tree is to develop.
+a.JPG)
2008 February. I had to do something about those cut off stubbed ends of the trunks, so they were shaped/carved and the branches were thinned again. All the main branches were wired as well to give movement and to spread the shape.
+b.JPG)
2009 March. This little tree grew well during the last year, filling in nicely. But this photo shows one of the problems with this species - all branches want to grow straight up. Even wired out, the growing tip will start again to grow straight up and not out. This causes a lot of crowding.
+a.JPG)
2009 March. The branches were thinned again and wired.
+b.JPG)
This year was tough on the tree, a bad infestation of Euonymus scale attacked and seemed to persist through many different treatments. This pest seems to take over much more easily in shaded conditions - trees placed in sunnier areas fared better.

July 2009. Not a lot of growth to show due to the Scale, and some branches actually died as a result. I didn't like the way this tree was progressing, style-wise. The top is just too flat and even.
+a.JPG)
2009 July. To make the apex more dynamic, the trunks were cut at different heights, using interesting branches that were already there. It looks sparse again, but the structure is now ready. Sometimes it just takes a while to work through the design.
+b.JPG)
2010 July. With the Scale on the run, this Euonymus had a great year, putting out a lot of growth. It was allowed to run during the last year and this is the result - much more strength and density.
+a.JPG)
2010 July. Multiple branches were again thinned and the remaining ones were wired down and away from each other. It should be noted that the non-lignified branches of Euonymus are VERY easy to break. They are almost like a succulent jade or other fragile branch. Be very careful when working with them if you have important branches.
+b.JPG)
2011 March. The left trunk had an odd die-back all long its length. I carefully pulled away the dead bark and cleaned it, and actually liked the effect of the stripe. Six years in the same pot, it needed to be repotted badly. Also it looked like it had filled out enough, that it was about time to get it out of plastic and into a Bonsai pot.
+a.JPG)
2011 March. A very dense and healthy root ball.
+b.JPG)
2011 March. Repotted into a round drum pot with a darkened "nail" pattern. I felt the color blended well with the trunks.
+c+first+Bonsai+pot.JPG)
2011 September. More density, more branches
+a.JPG)
2011 September. Thinned out and wired again. This continual wiring out of the tips of a plant that wants to grow vertically creates a really interesting undulating branch line over time. People who work with Pine trees know this well.
+b.JPG)
2012 August. This tree is finally beginning to feel mature. The branches are beginning to have a light, airy quality to them that years of technique brings, and the trunks are all relating to one another. The only yearly maintenance is to wire those outer growing tips down, to shorten branches back to the line of the tree, and to watch for that dreaded Euonymus scale.
+b.JPG)
2014 April. Now back to the present. I need to develop more density in the top of the left trunk and work on its apex. Right now it is just too loose and open.
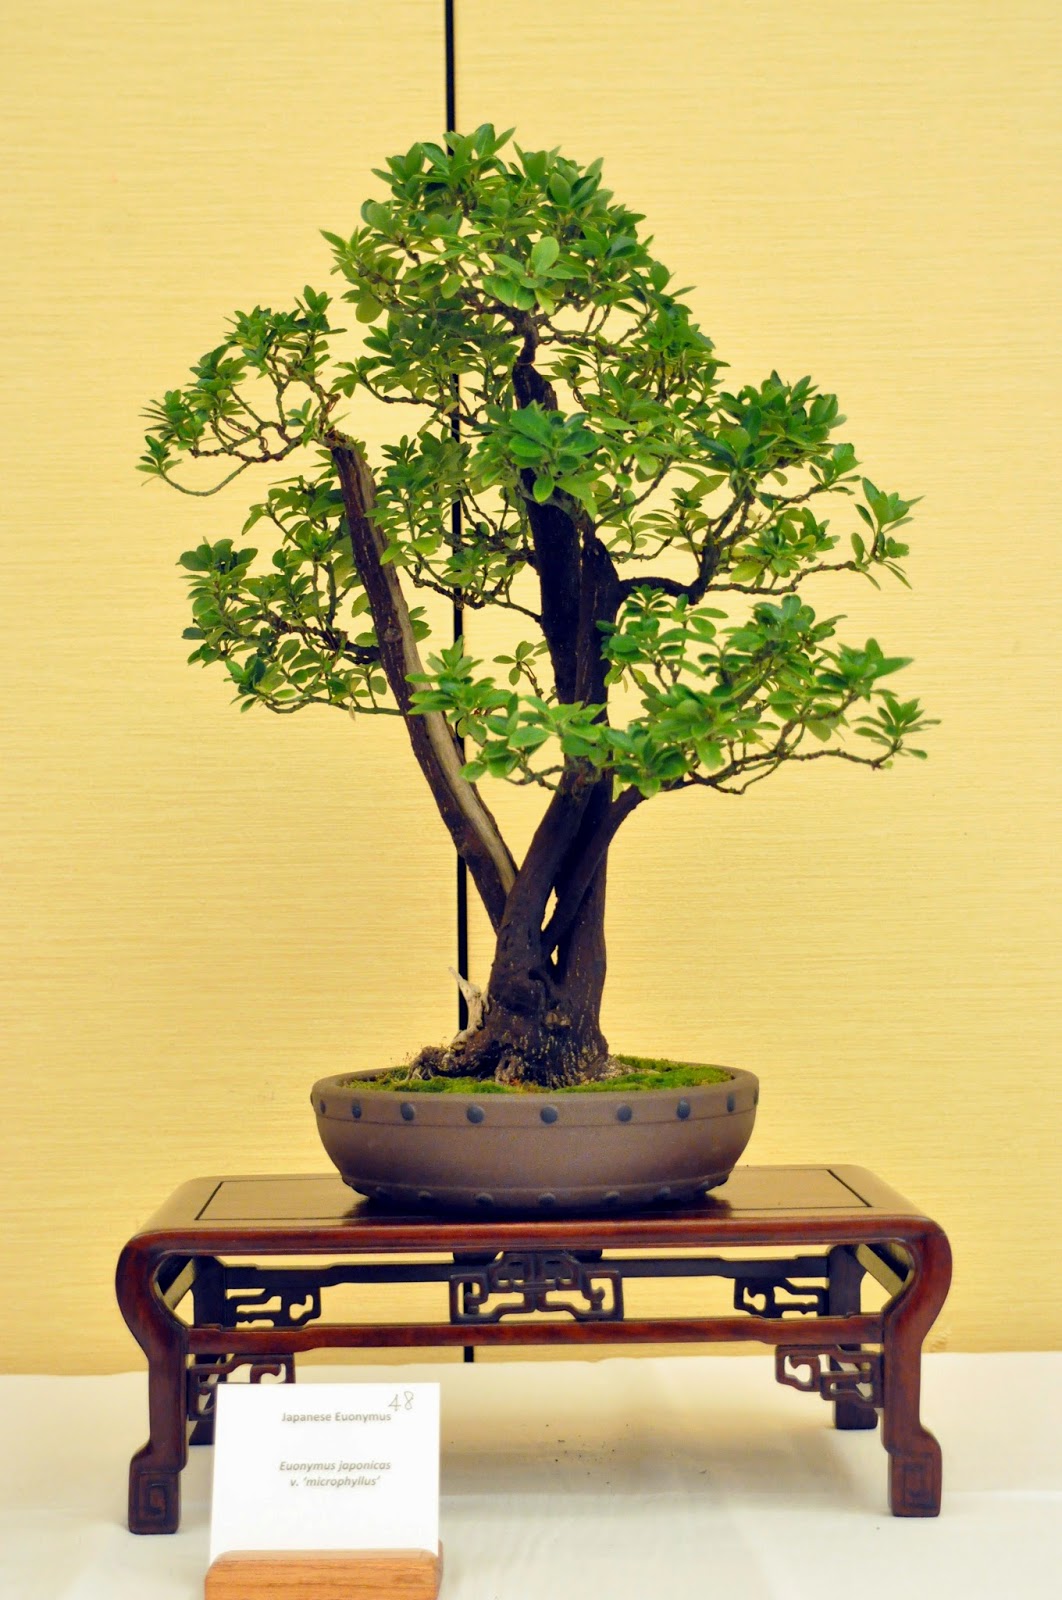
If you get the chance to work with Euonymus japonica 'Microphylla' - do it! There are different varieties of Euonymus as common hedging material, but this variety seems to be the best suited to Bonsai. There is a dwarf variegated form too, but it grows even slower, so a collected specimen is a must! The fun of this tree, besides the rarity and interesting trunks is the fact that it was a curbside discard.

.jpg)

+b.JPG)
.JPG)
+a.JPG)
+b.JPG)
+a.JPG)

+a.JPG)
+b.JPG)
+a.JPG)
+b.JPG)
+c+new+front+poss.JPG)
+d.JPG)
+a.JPG)

+a.JPG)
+b.JPG)
+a.JPG)


+a.JPG)
+b+trimmed+&+thinned.JPG)


+a.JPG)
+a.JPG)
+a.JPG)
+b.JPG)
+b+rootbound.JPG)
+b.JPG)
+a+Chinese+Holly.JPG)